Showing posts with label DIY Crafts. Show all posts

Saturday, 26 April 2014

Fit for a Princess! - Crochet Edged Receiving Blanket


 When my brother got married (a few years ago now) my Aunt gave a shower gift wrapped in tea towels, I LOVED the idea!  I have to admit I've used the idea a few times myself for wedding gifts, as well as used receiving blankets as wrapping for baby gifts.

I think its a great idea to save a little paper (or when you forget to pick up paper!) and still give a beautifully wrapped gift.

 Last week I went a baby shower for a soon to be arriving little girl, and I not only used my Aunt's idea again, but I one-uped myself!  I decided to add a little crocheted trim to the edge of a store bought receiving blanket :)


It's a small little detail that gives the basic blanket so much more!  I hope it adds a little smile to her Momma's face when she sees her little princess wrapped up in the blanket that was made just for her (even if it started out as a blanket for commoners! HA!)

So now I'm sure you're thinking that you need to fancy up a blanket or two ;) Right?!?!  Well you're in luck because I'm going to share with you how I did it step-by-step! Yay!!!!

First, you need a steel crochet hook (I did my first blanket with an aluminum hook and I found it bent a little and was hard to work with, the steel was much stronger and easier to poke through), some fine yarn (I used Red Heart Luster Sheen in Lime because it was a perfect match to the green in the blanket) but any fine yarn should work, as well as the blanket you'd like to embellish (mine was in a 'Garanimals' four pack from Wal-Mart).


To start, pick anywhere along the edge of your blanket under the finished edge to poke your hook through.  


Next, pull your yarn through as a slip stitch (slst)


Using the crochet hook, poke another hole next to your first and pull the yarn through and single crochet (sc) being careful to keep the stitch along the outer edge of the blanket.


Continue sc along the edge of the blanket making sure to keep your stitches as even and uniform as possible (you could measure out your holes first using a ruler and a washable fabric maker, but I like to live on the edge!)  until you reach the beginning, join with a slst

Your next row (which I managed to miss photographing, sorry!) is a row of sc around, joined with a slst.

Then, ch 4, skip first 3 sc, join with a sc in 4th st, repeat around, join with a slst.


Final row: sc, hdc, 3dc, hdc, sc, in each ch 4 space around, join with a slst.


There you have it!  A beautifully edged blanket to give to a new mother as either wrapping for a gift, or as the gift itself because, let's face it, this blanket is a beautiful gift in itself!

Go ahead and give it a try, as always please let me know if you have any questions, I will try my best to help out!  

If you do try it out, please let me know!  I'd love to hear form you!


I've linked-up with Make It and Love It
http://www.makeit-loveit.com/wp-content/uploads/2014/02/link-party-button1.jpg

Thanks for stopping by!
- Jenn


Thursday, 28 November 2013

All that glitters!

So I was checking out Pinterest the other day and came across the awesome tutorial on how to make your own glitterized (is that a word) mug that was ... wait for it ... dishwasher safe!!!!!  I quickly checked out Wal-Mart only to find they do not carry the Martha Stewart decopodge line, can you imagine how crushed I was?!?!?!?  I sadly decided that I would not be glitterizing anything until either a)I get to the States and find the glorious dishwasher safe decopodge or b)Wal-Mart eventually carries said decopodge.

Anyway I happened to stop in at Michael's while passing through a neighboring town and guess what I found!!!!!!  Michaels carries the Martha Stewart Decopodge!!!!!  Yay!  I snatched that bottle up and did a mini happy dance (inside my head of course) as I picked out my glitter.  This event gets even better when I got to the check out and found out that the 50% off coupon actually worked on Martha Stewart products that week (they usually are excluded around here).

I was all to eager to get started on my mugs once the kiddos were tucked into bed for the night, because lets face it, three kids and glitter would not be pretty ... well I guess they WOULD be pretty, but not in the way I would appreciate!

Because I'm a fan of the good old redneck Mason jars, I decided to glitter up some of those bad boys!  Want to make some for yourself?  Run, RUN to Michael's and pick up some of the Martha Stewart decopodge in the pink bottle (but not the stuff that is tinted pink!) and either check out white house black shutters or follow along below.  I pretty much followed her verbatim except for swapping out a mug with a mason jar and I added a second coat of glitter because, why not!

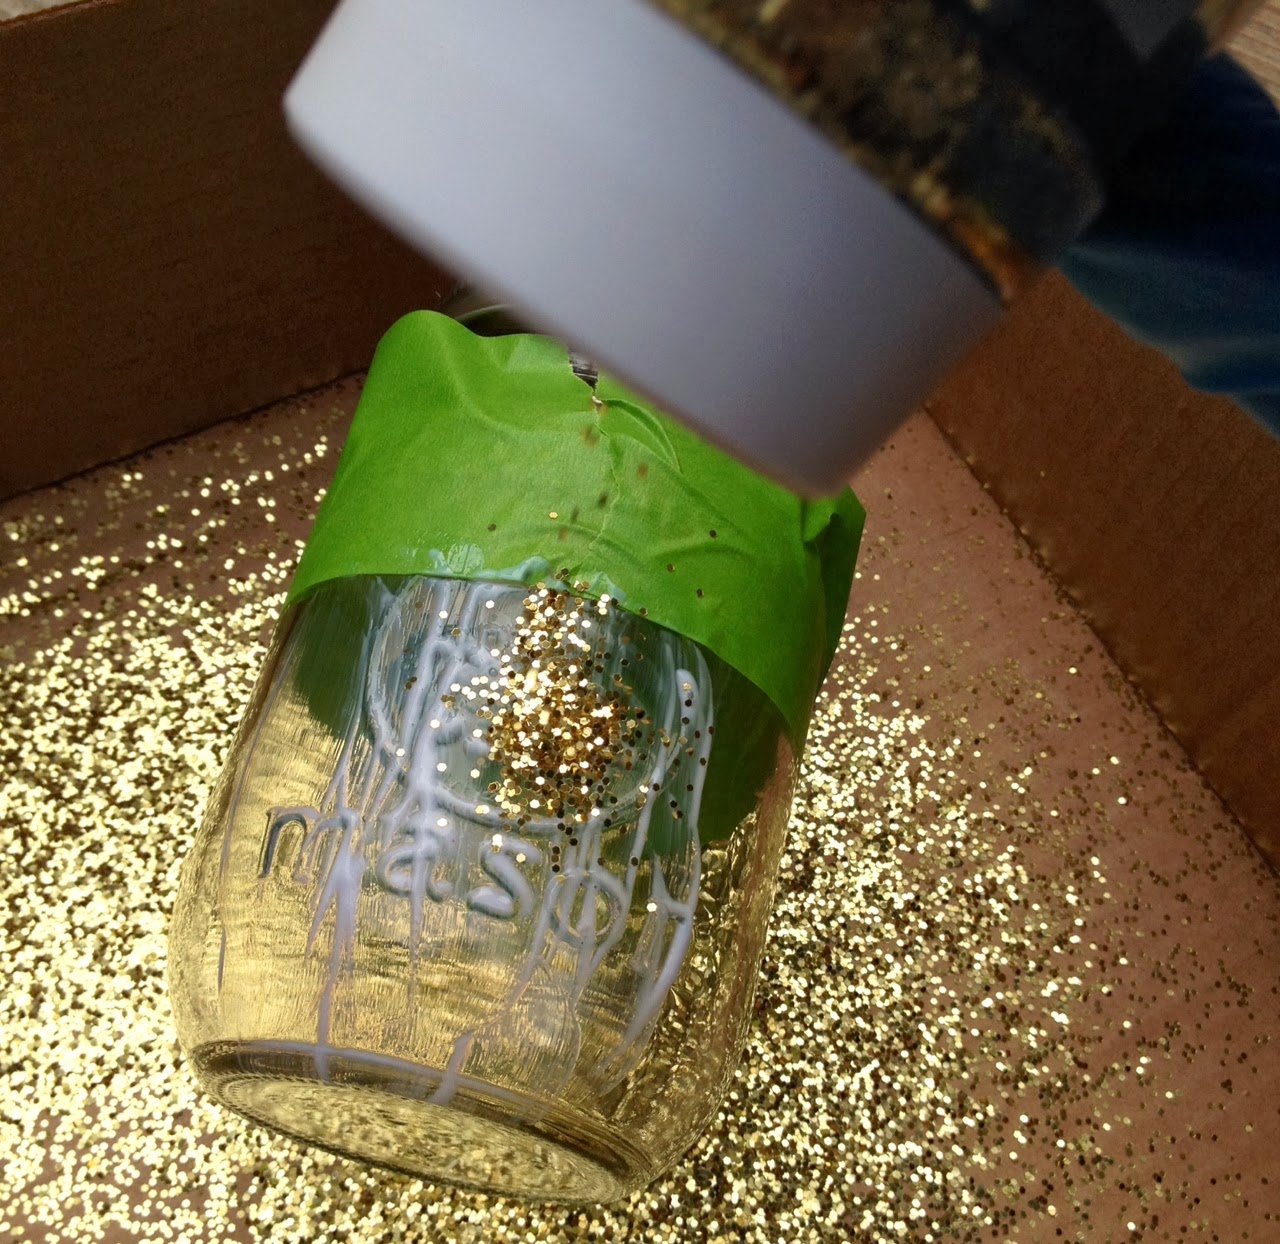
First, gather up your supplies.  I used the case my Mason Jars came in and I found it worked really well for collecting excess glitter and because the corners don`t touch it also made a wonderful funnel for replacing excess glitter!


Make sure to clean the surface really well with rubbing alcohol before you start, you don`t anything in the way of you glitter sticking!


Next, tape off where you do not want the glitter to go, unless the free form line is the look you love, then by all means, go with your heart!  I used Frog Tape because that`s what I had already, I`m sure regular making tape would work just fine.


Now decopodge that jar up!  I used a fairly thick coat after the first one, I`m not sure that the thickness really made a difference (I had hopes more glitter would stick), then pour on your glitter.


Now carefully peel off the tape, you don`t want the decopodge to dry on it.


Now repeat, repeat, repeat!  And set the little beauties aside to dry


After letting my first coat dry for a few hours I went back and applied another coat of docopodge and glitter because I felt it was a little too thin after brushing off the excess.  I then added my two sealing coats (with overnight drying between them).  Honestly, aside from finding the proper decopodge in the first part, the hardest part of this project is waiting the 28 days for it to cure!

Go ahead make yourself a glitter mug, I`m sure you`ll love it!

Oh and thanks again to Ann Marie for the inspirational tutorial in the first place!